01Add a loan
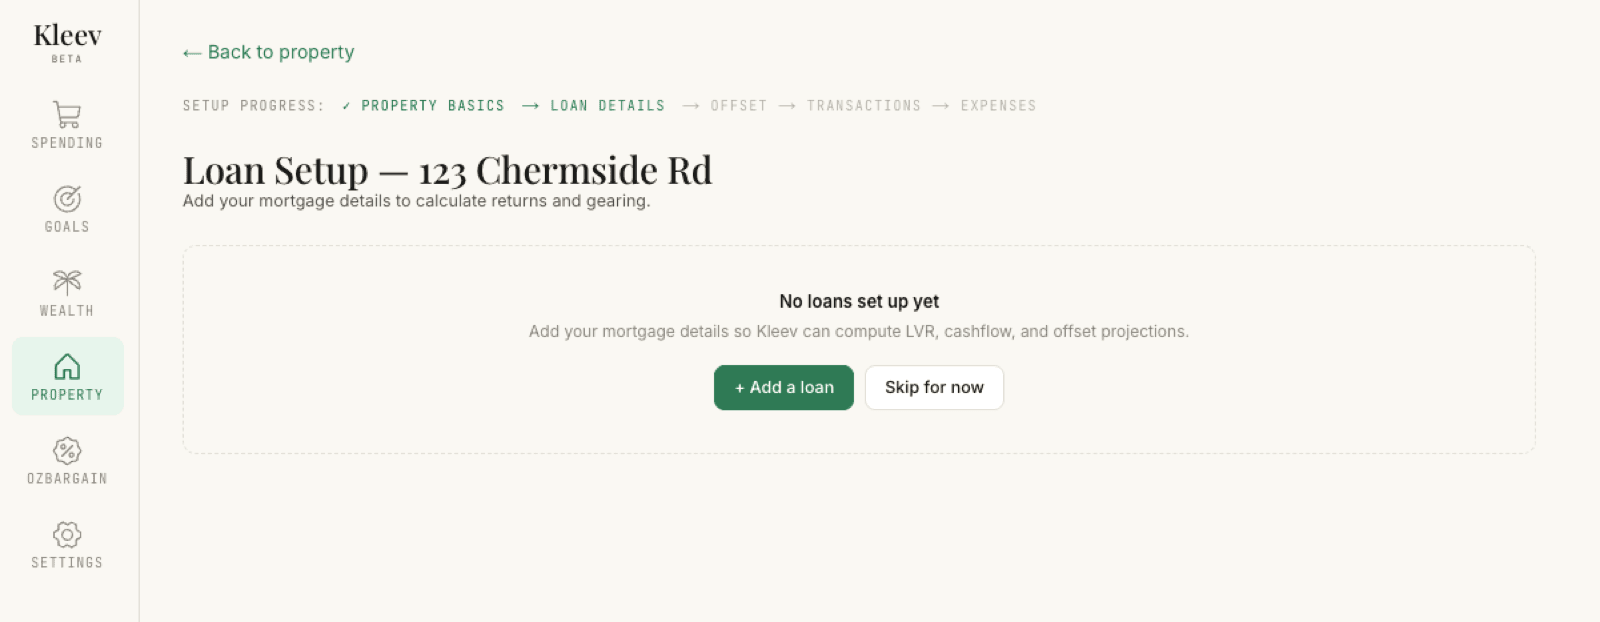
From your property’s page, open Loan Setup. The Setup progress strip at the top shows where you are — Property Basics is ticked, Loan details is the current step, and Offset, Transactions, and Expenses are still to come. Until you add a loan, the page shows No loans set up yet: add your mortgage details so Kleev can compute LVR, cashflow, and offset projections. Click + Add a loan to start — or Skip for now if the property has no mortgage.
There are two ways to fill in the details, and you can mix them:
Upload a loan statement CSV. Export your mortgage account’s transactions from online banking (the same way as a normal account) and drop the file into Upload Mortgage CSV. Exports from any Australian lender are accepted, and if you can’t find historical statements, your latest month’s CSV is enough to start with. While Kleev reads the file, the form greys out behind an Analysing CSV… spinner; when it finishes, the fields it could work out are pre-filled — the lender, your monthly repayment, the closing balance, and an estimated interest rate.
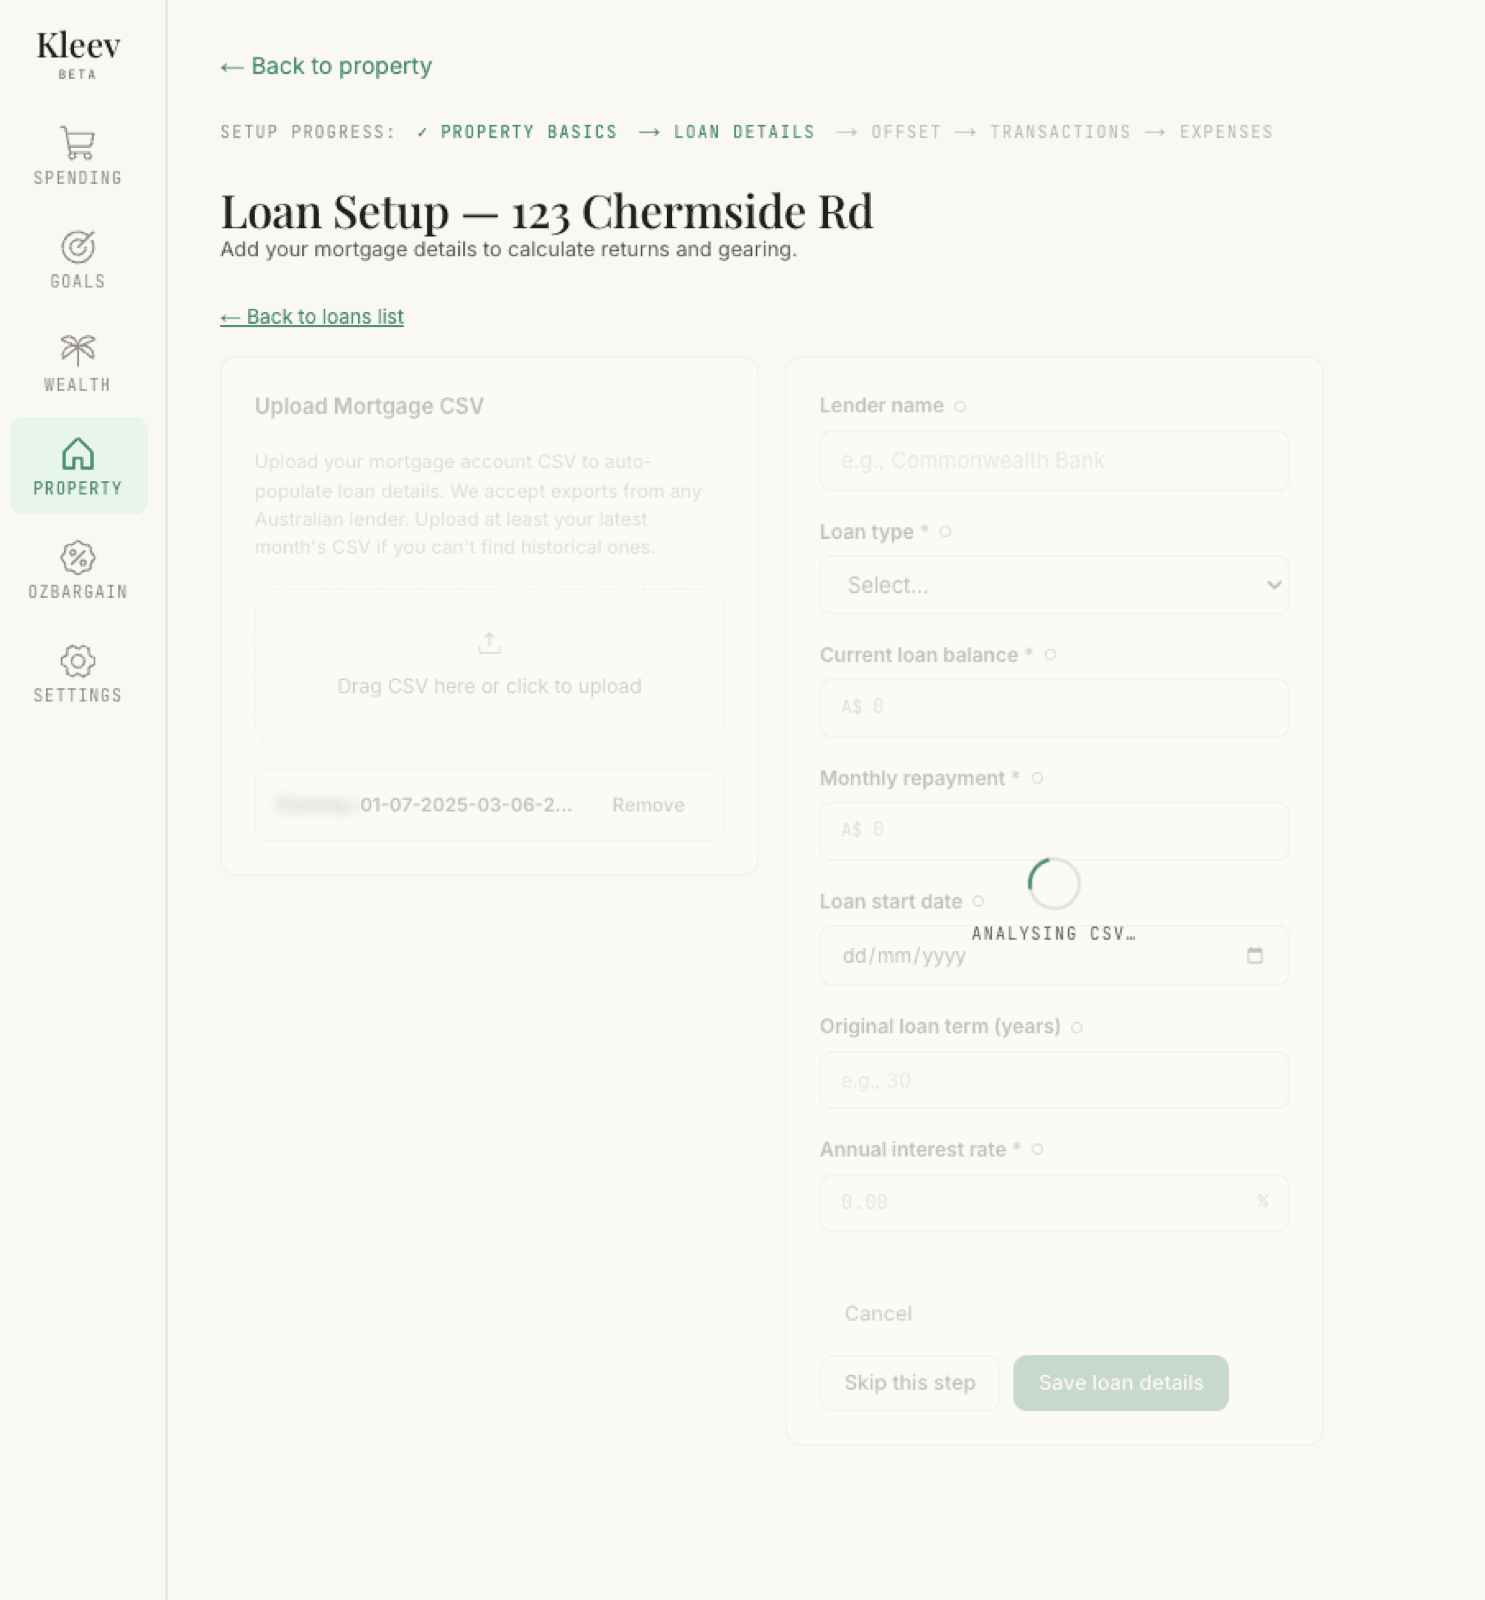
The small dot next to each field label is a confidence marker. It starts hollow, and turns green once the value is solid — either because it came straight from your CSV or because you typed or confirmed it yourself.
Type the details in. Or just fill in the form directly. Four fields are required:
- Loan type — Principal and Interest, or Interest Only (with an end date for the interest-only period).
- Current loan balance
- Monthly repayment
- Annual interest rate
Lender name, loan start date, and original term are optional but improve the history and payoff calculations.
02The live summary
As you type, the Estimated Summary (live) panel on the right recalculates — it’s marked recalculates as you type, and it does:
- Monthly interest and Monthly principal — how each repayment splits, with a bar underneath showing the proportion (in the example below, $2,995 interest and $5 principal — 99.8% versus 0.2%).
- Payoff date — when the loan reaches zero at the current rate and repayment. If your repayment doesn’t cover the interest, Kleev says so — Never (repayment ≤ interest) — instead of inventing a date.
- Total interest (life) — all the interest you’d pay over the remaining life of the loan.
How is this calculated? below the panel expands to show the working.

Click Save loan details when you’re happy. If the property has no loan, use Skip this step instead — the rest of the setup still works.
03Your loans, listed
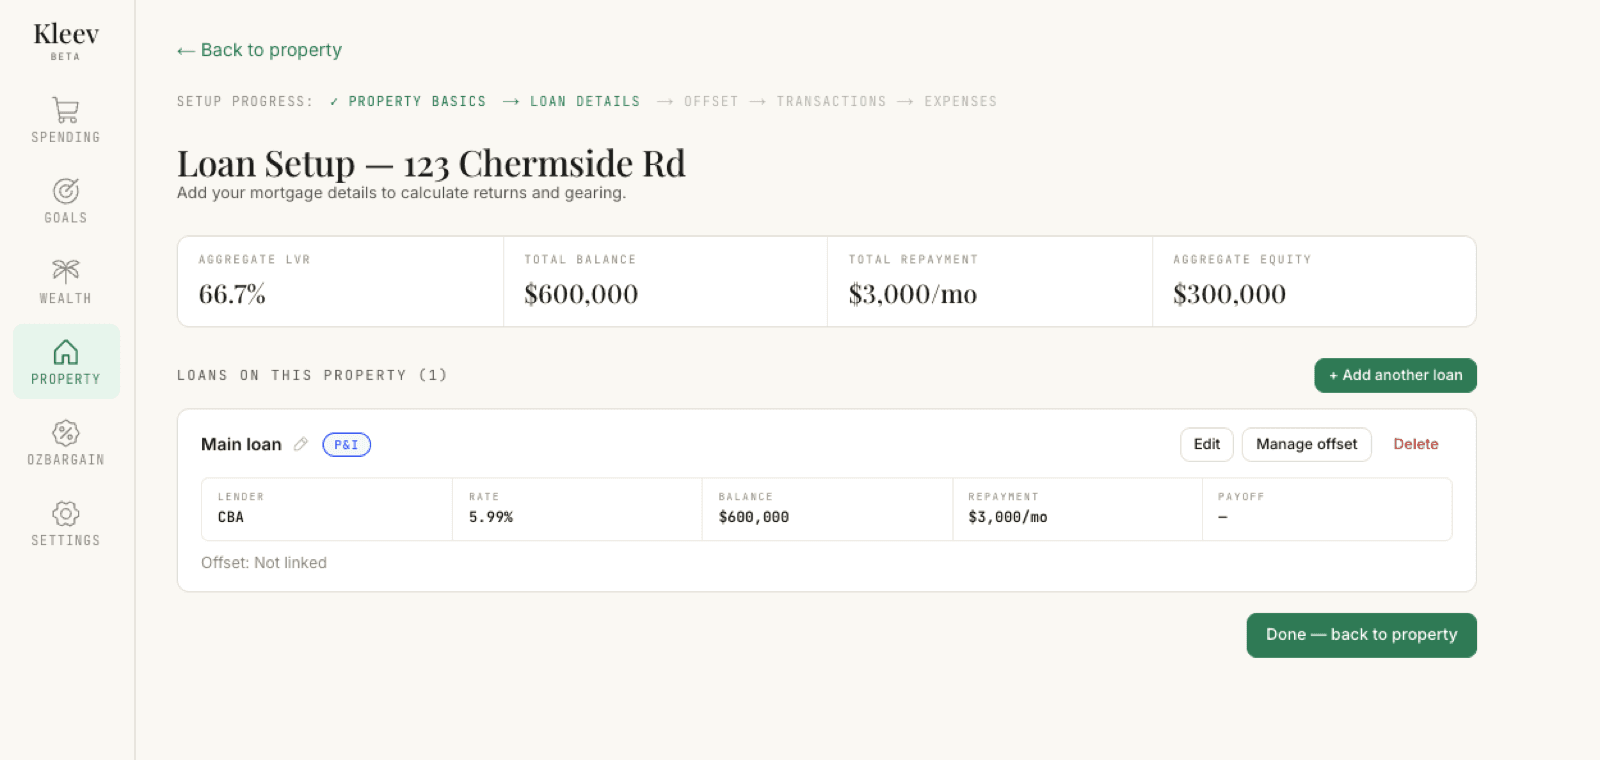
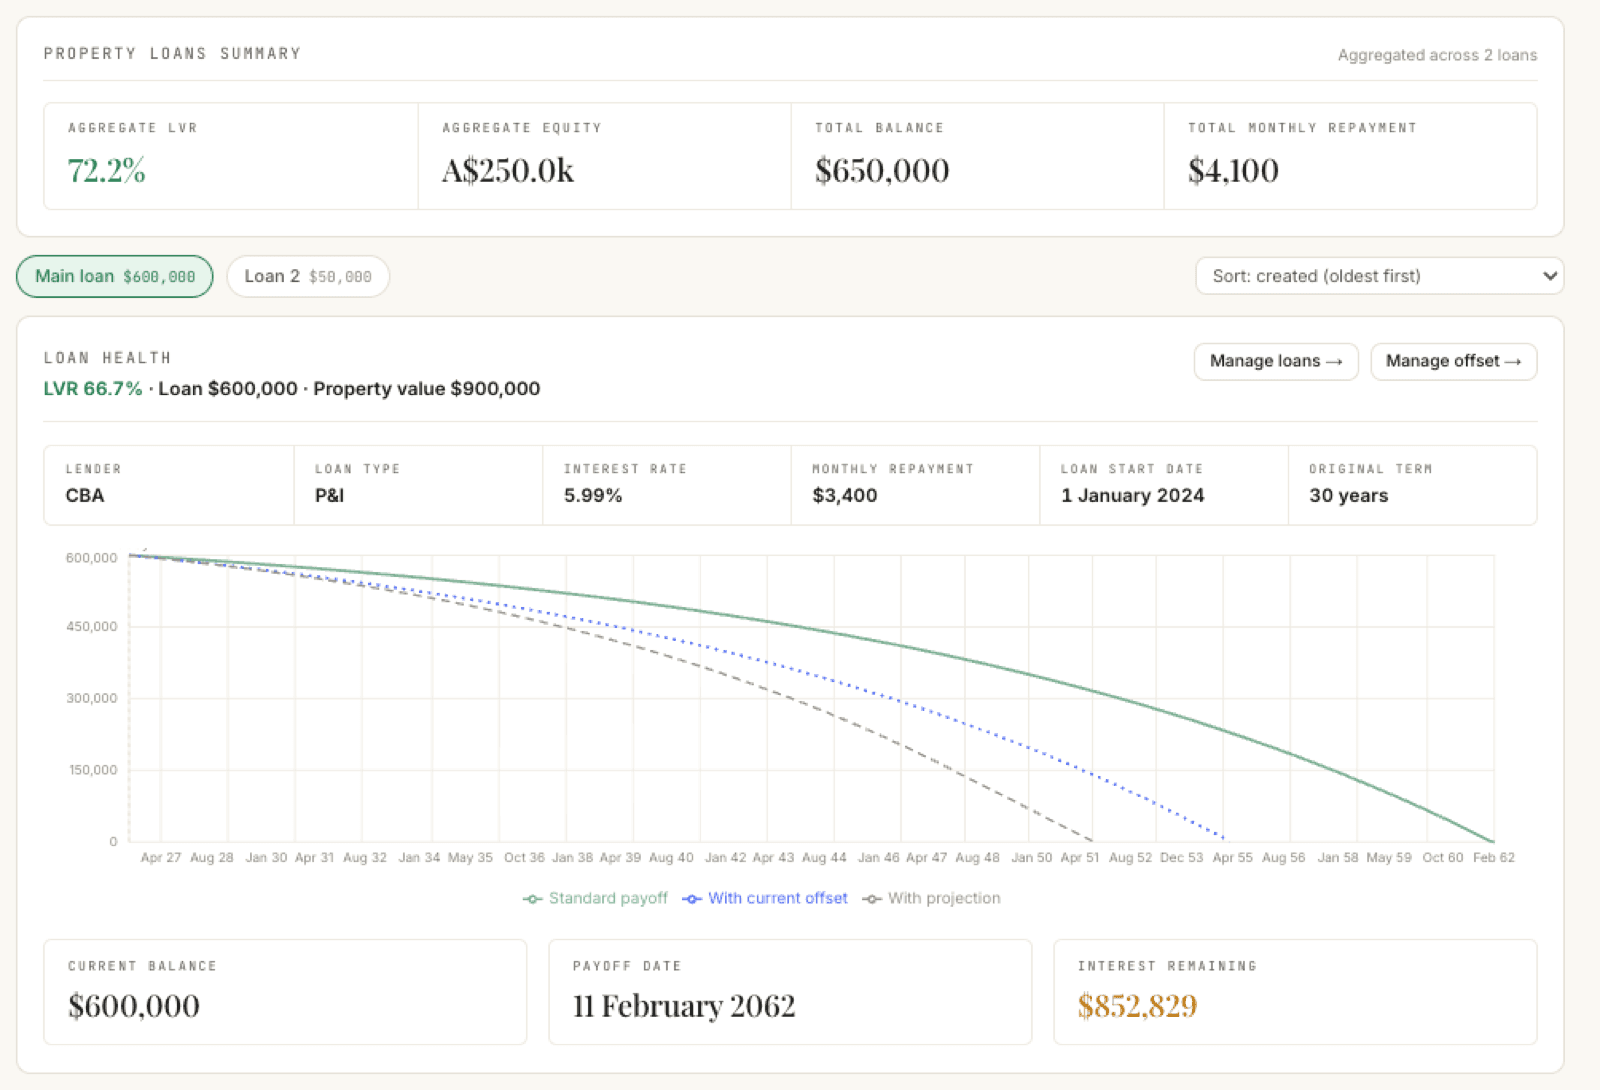
Saved loans appear as cards under Loans on this property. Each card shows a chip for the loan type (P&I or Interest Only), a facts strip — lender, rate, balance, repayment, and payoff — and Edit, Manage offset, and Delete buttons. Until you link an offset account, the card reads Offset: Not linked.
Properties with split loans are fine — click + Add another loan for each. The first is named Main loan, then Loan 2, and so on; use the pen icon to rename them. A strip at the top totals everything up: aggregate loan-to-value ratio, total balance, total repayment, and aggregate equity.
When the list looks right, Done — back to property takes you back — or carry on to the next step and link an offset.
04Link your offset accounts
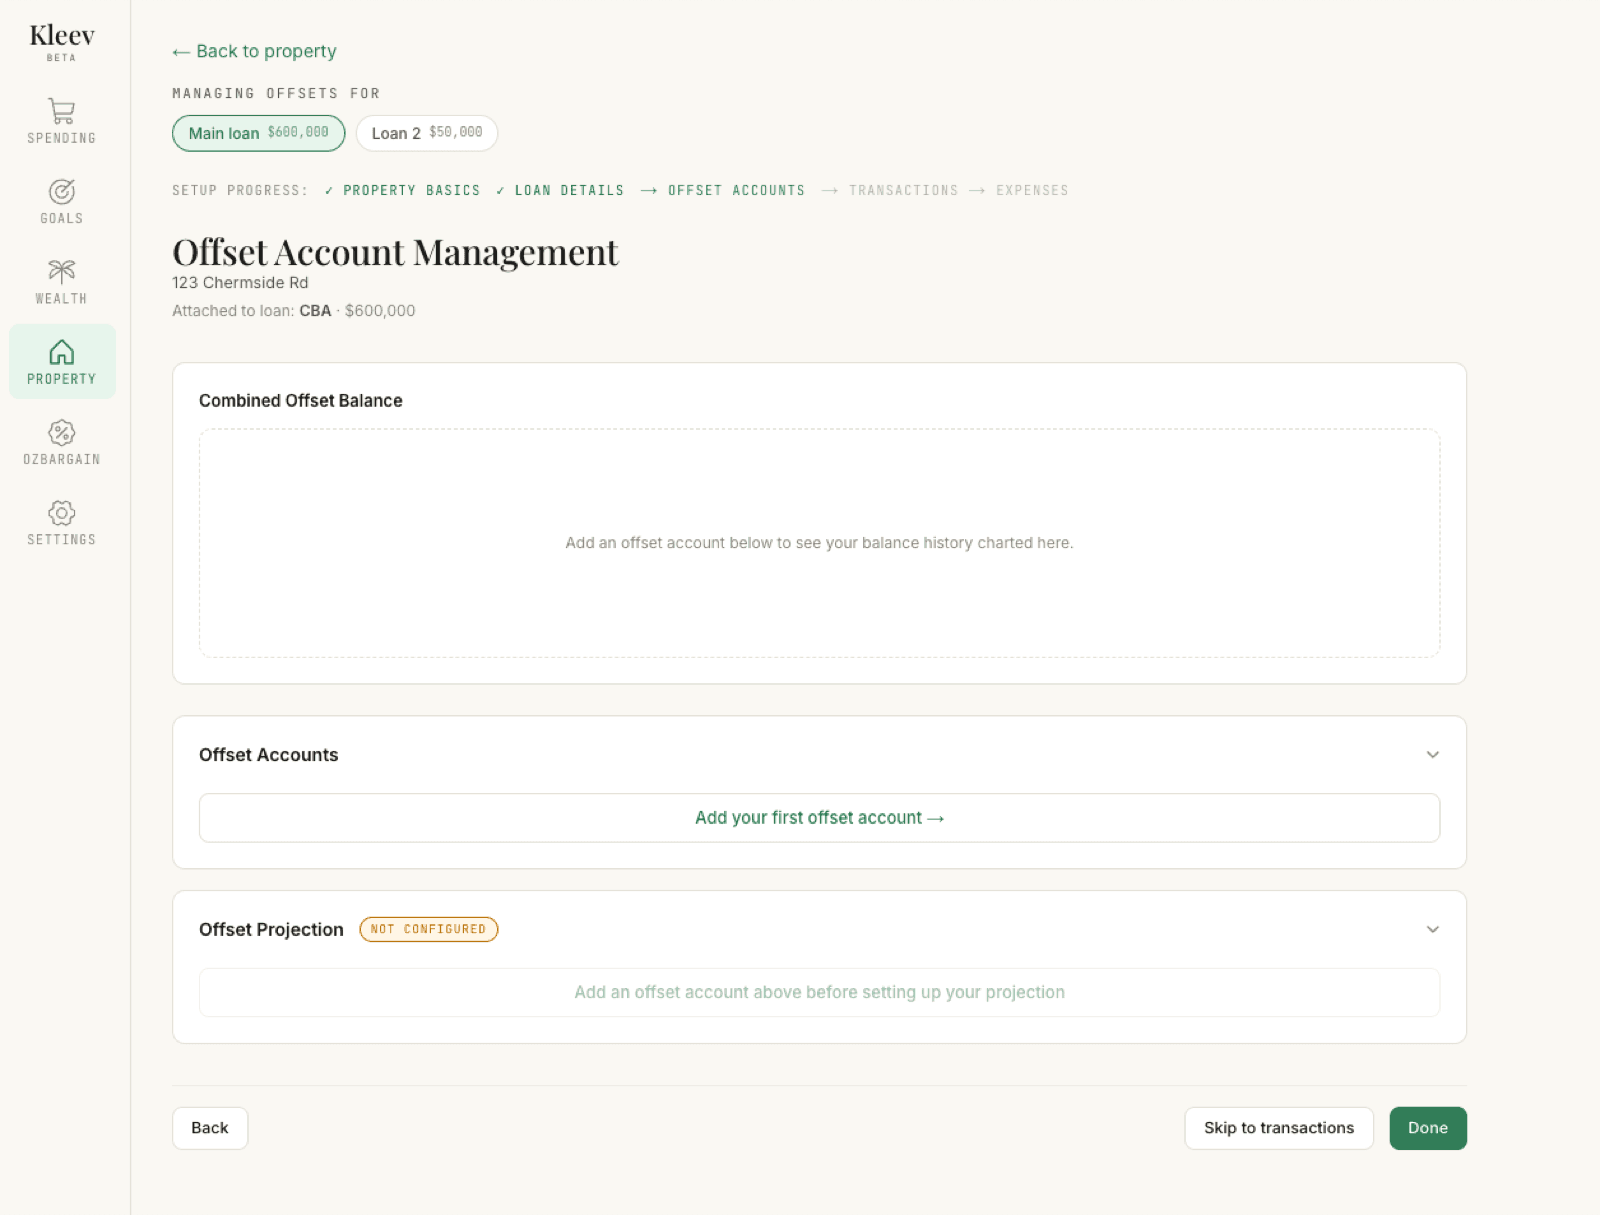
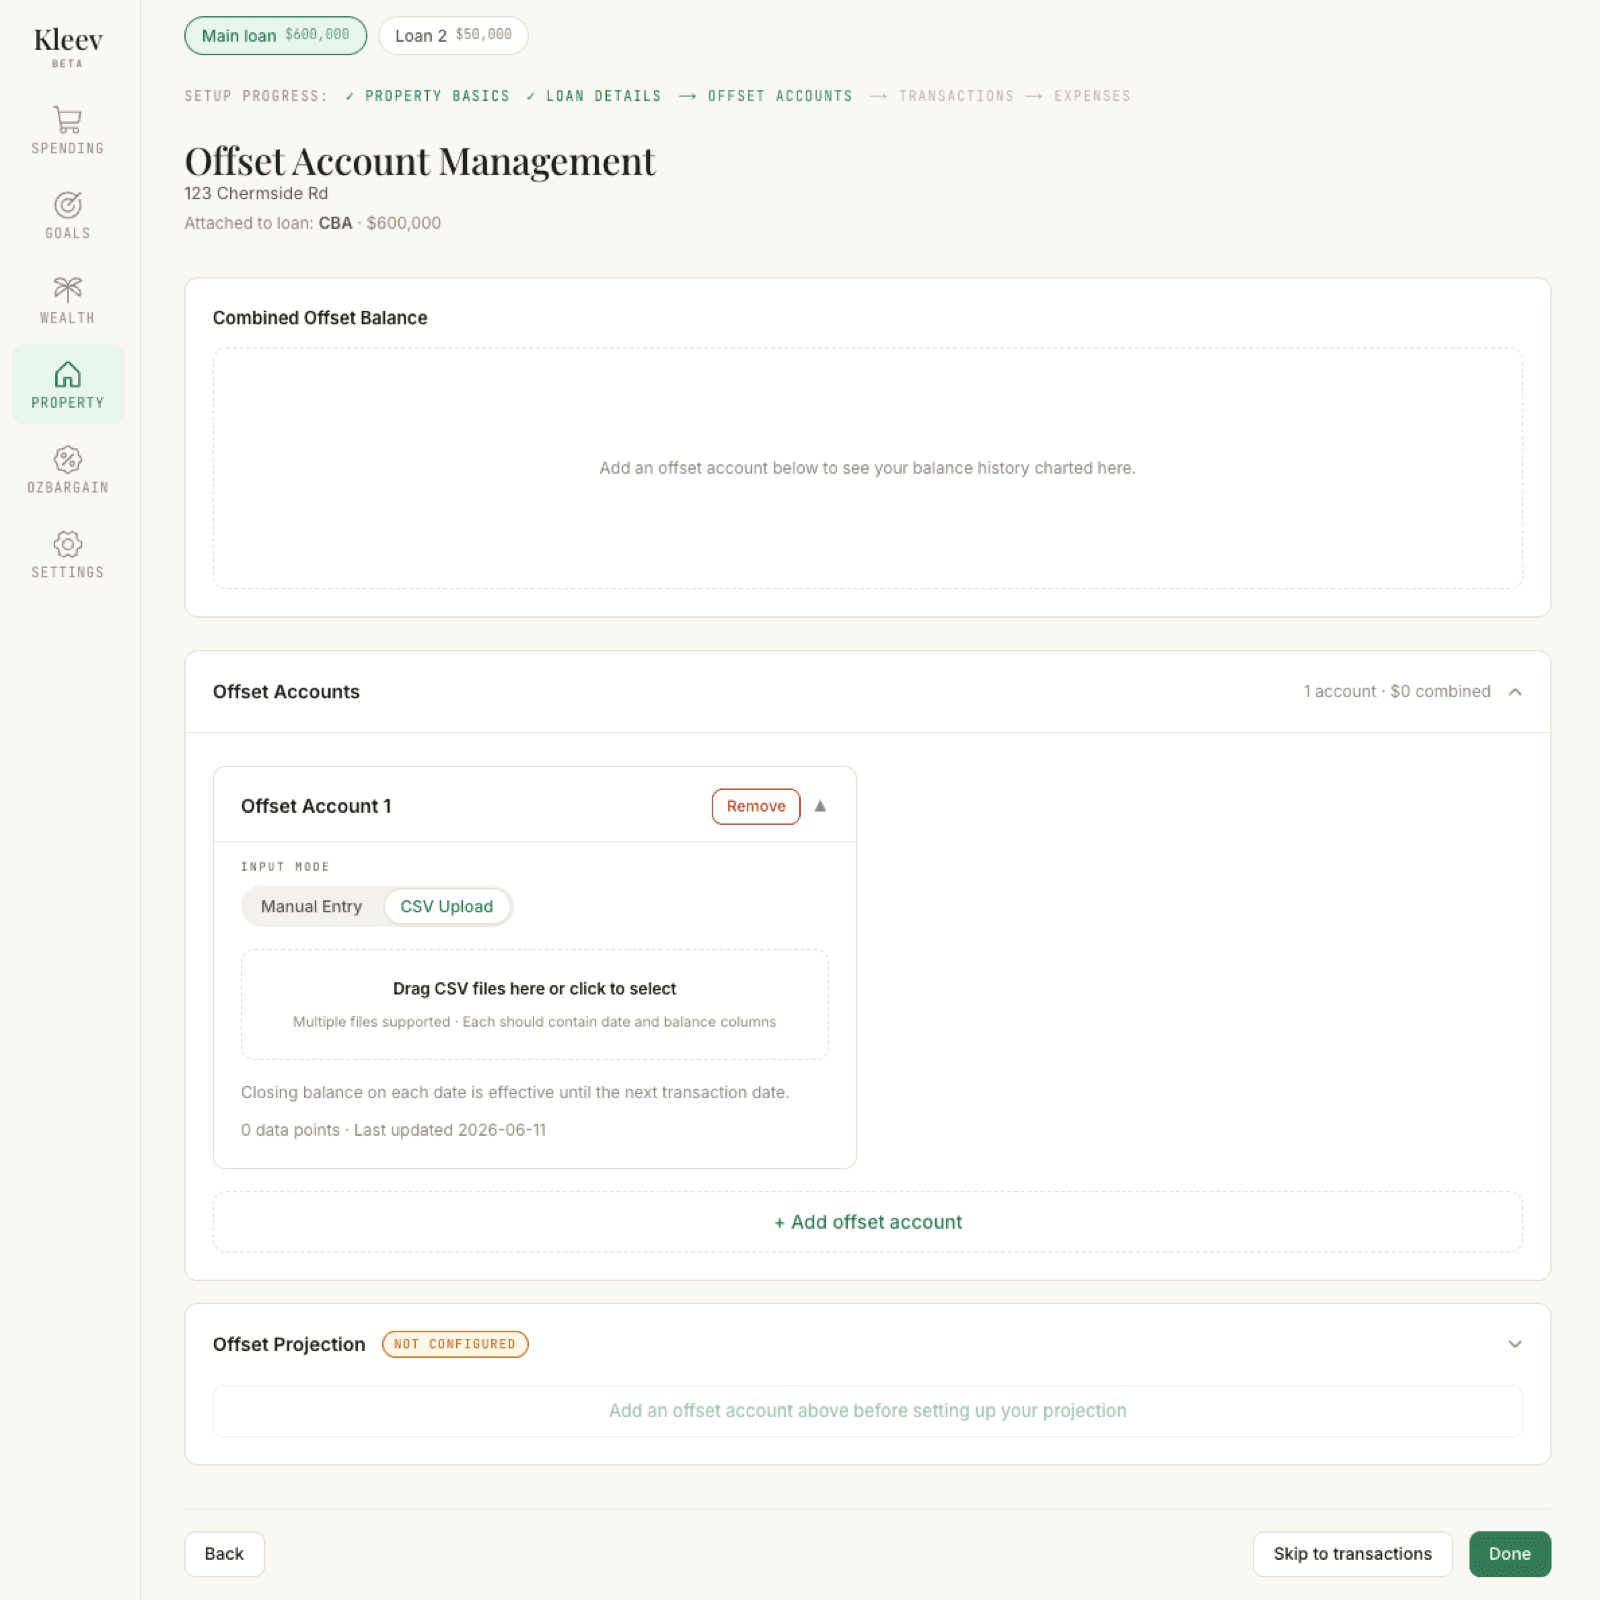
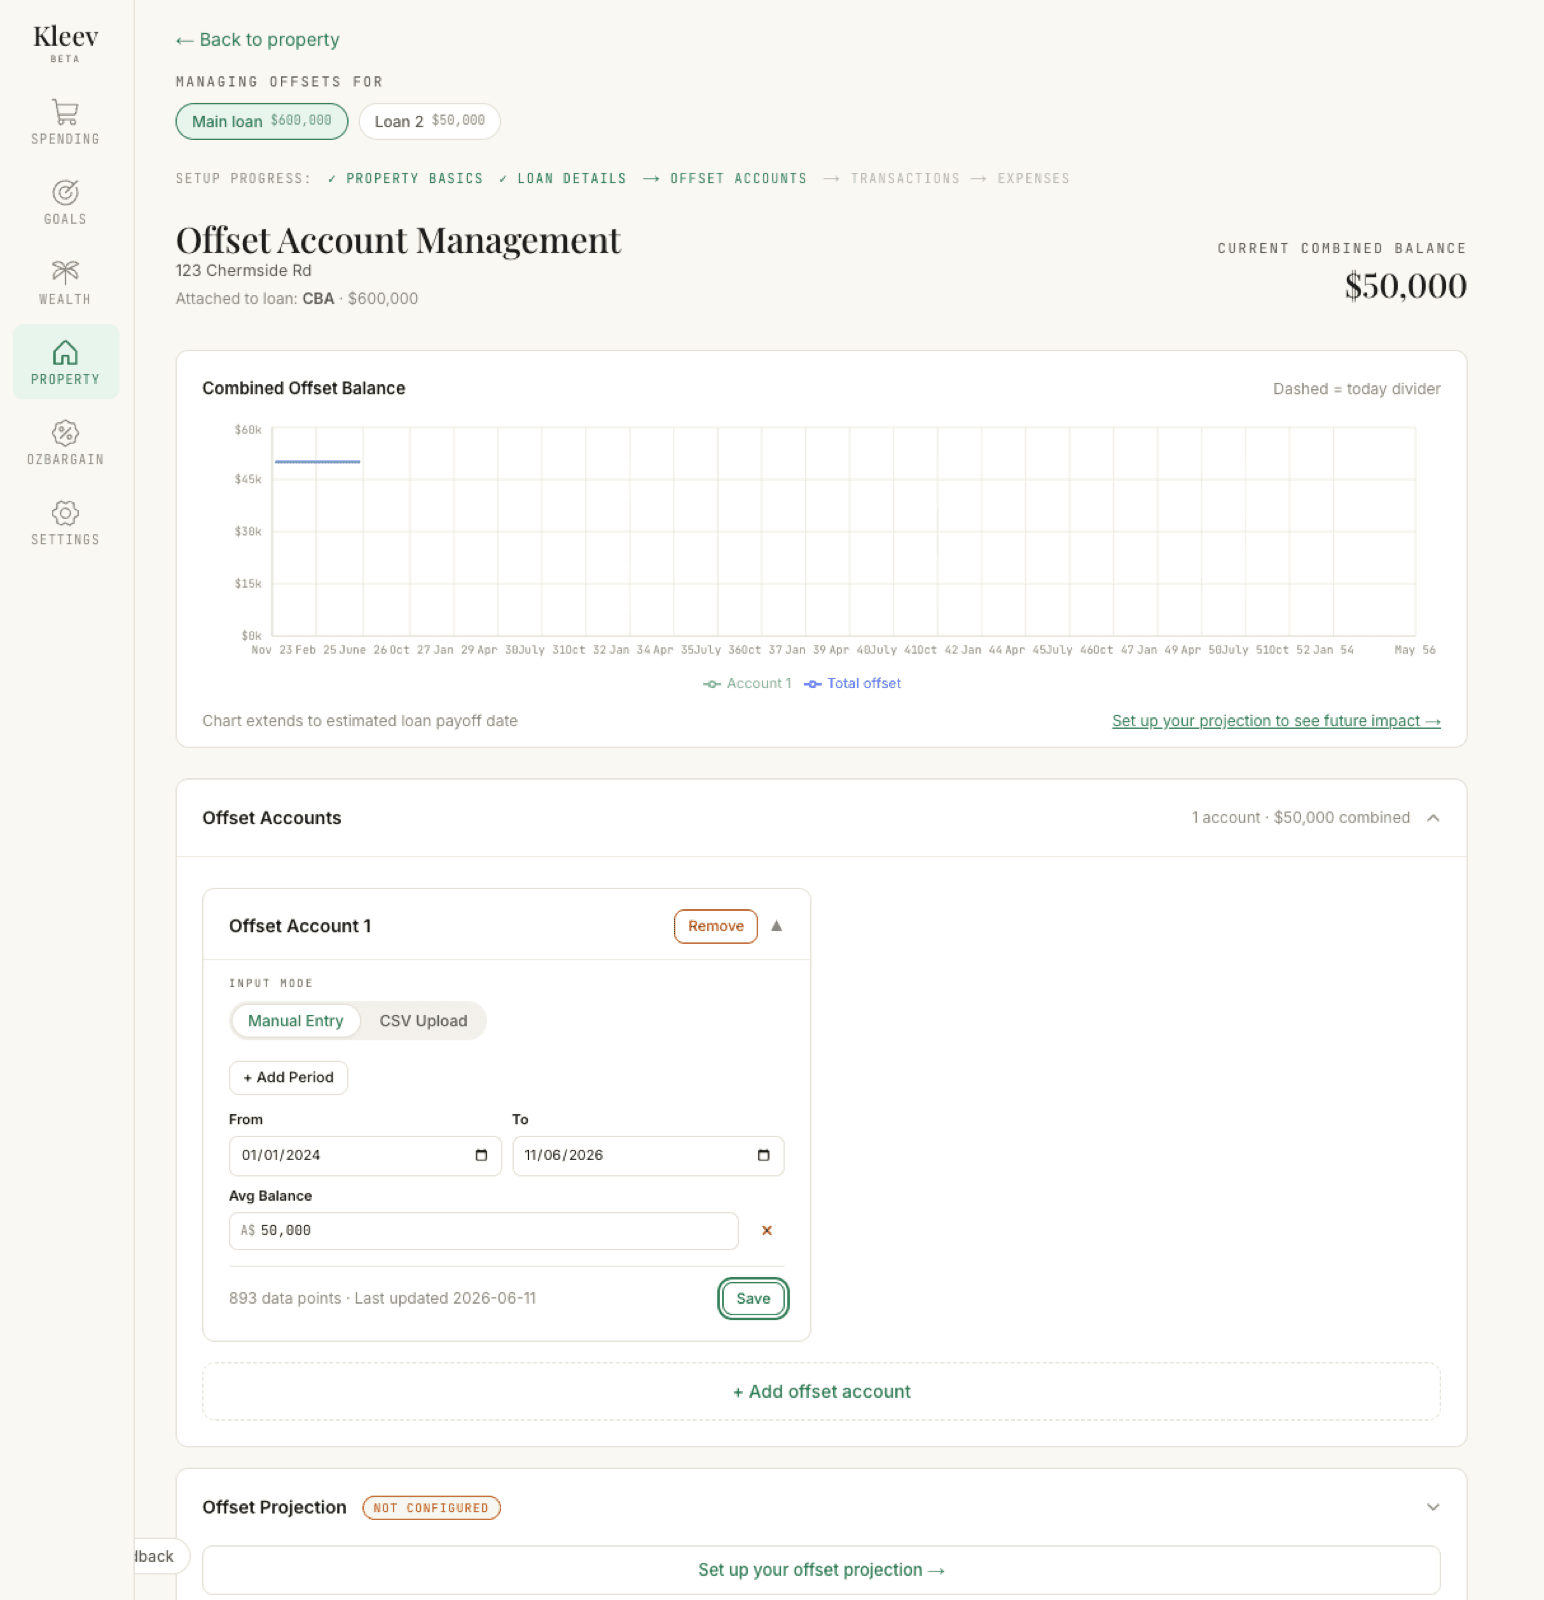
An offset account is a savings or everyday account whose balance reduces the loan balance your interest is charged on. Click Manage offset on a loan to open Offset Account Management. Offsets are managed per loan: the Managing offsets for pill tabs at the top switch between your loans (each pill shows the loan’s balance), and the line under the heading confirms which one you’re working on — Attached to loan: CBA · $600,000. The setup-progress strip has moved on too: Offset Accounts is now the current step.
Before you add anything, everything on the page is waiting: the Combined Offset Balance chart says Add an offset account below to see your balance history charted here, the accounts list offers Add your first offset account →, and the Offset Projection section sits behind a Not configured chip — Add an offset account above before setting up your projection.
Click Add your first offset account → (and + Add offset account for any after that). Each account is a card with an Input mode switch — Manual Entry or CSV Upload — and you can flip between the two at any time.
Drop in a CSV. The fastest way is CSV Upload: export the offset or savings account from online banking — the same kind of CSV as any other account — and drop it into Drag CSV files here or click to select. Kleev reads the date and balance columns and builds the account’s balance history from them. Multiple files are supported, so you can drop a whole year of monthly exports in one go. The closing balance on each date is treated as effective until the next transaction date, so gaps between statements are filled in sensibly. The counter underneath — 0 data points · Last updated… — ticks up as your files land.
Or type periods in. Switch to Manual Entry and click + Add Period: each period is a From and To date plus an Avg Balance, and you can stack as many as you need. Click Save and the periods become daily balance points — the counter shows the result (below, one two-and-a-half-year period at $50,000 becomes 893 data points).
The default name is Offset Account 1 — click the name to rename it to whatever your bank calls the account, and Remove deletes it. You can link several accounts to one loan; the page header keeps a running Current combined balance.
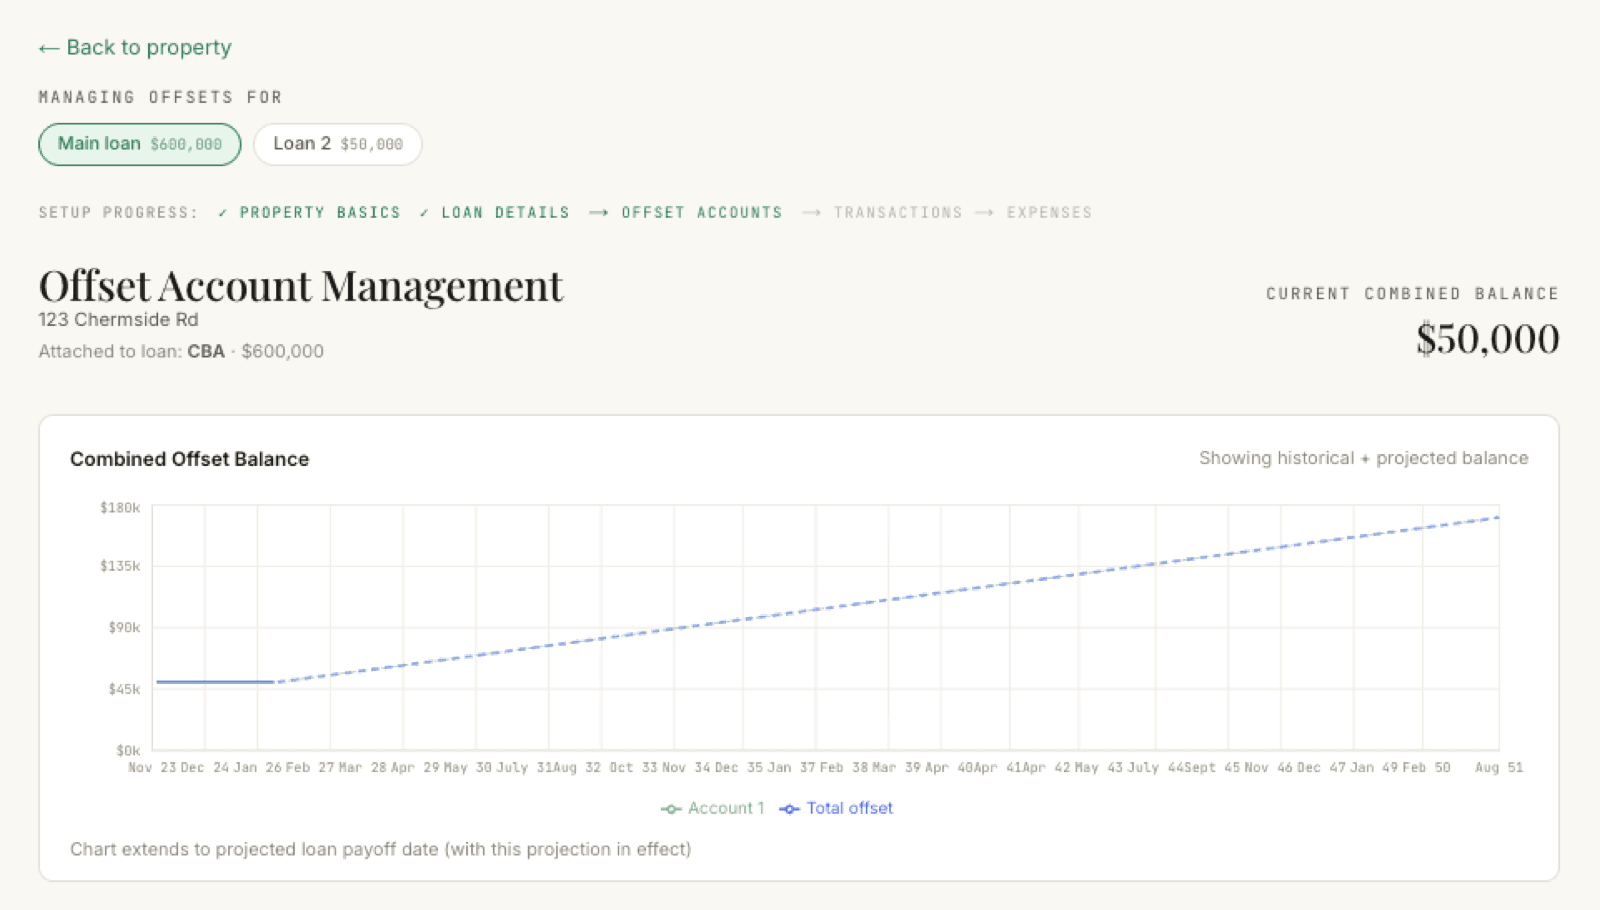
As soon as an account has data, the Combined Offset Balance chart fills in — a line per account plus a Total offset line, a dashed divider marking today (Dashed = today divider), and an x-axis that runs all the way out: Chart extends to estimated loan payoff date. The link in the corner points at the next step — Set up your projection to see future impact →.
05Set up a what-if forecast
Set up your offset projection → opens the Offset Projection panel, which answers the question “what happens if I keep saving into my offset?”. The Projection mode switch gives you three ways to describe a saving plan:
- Monthly deposit — “I’ll add a fixed amount each month.” You set the Monthly amount, a Start date, and an optional End date.
- Target balance — “I want my offset to reach a certain amount by a certain date.” Kleev tells you how much you’d need to save each month to get there.
- Growth rate — “Assume my offset grows by a fixed percentage each year.”
Calculate previews the impact without committing to anything; Save projection keeps the plan. Once saved, the section’s Not configured chip is replaced by a summary of your plan — here, $400/mo from July 2026.
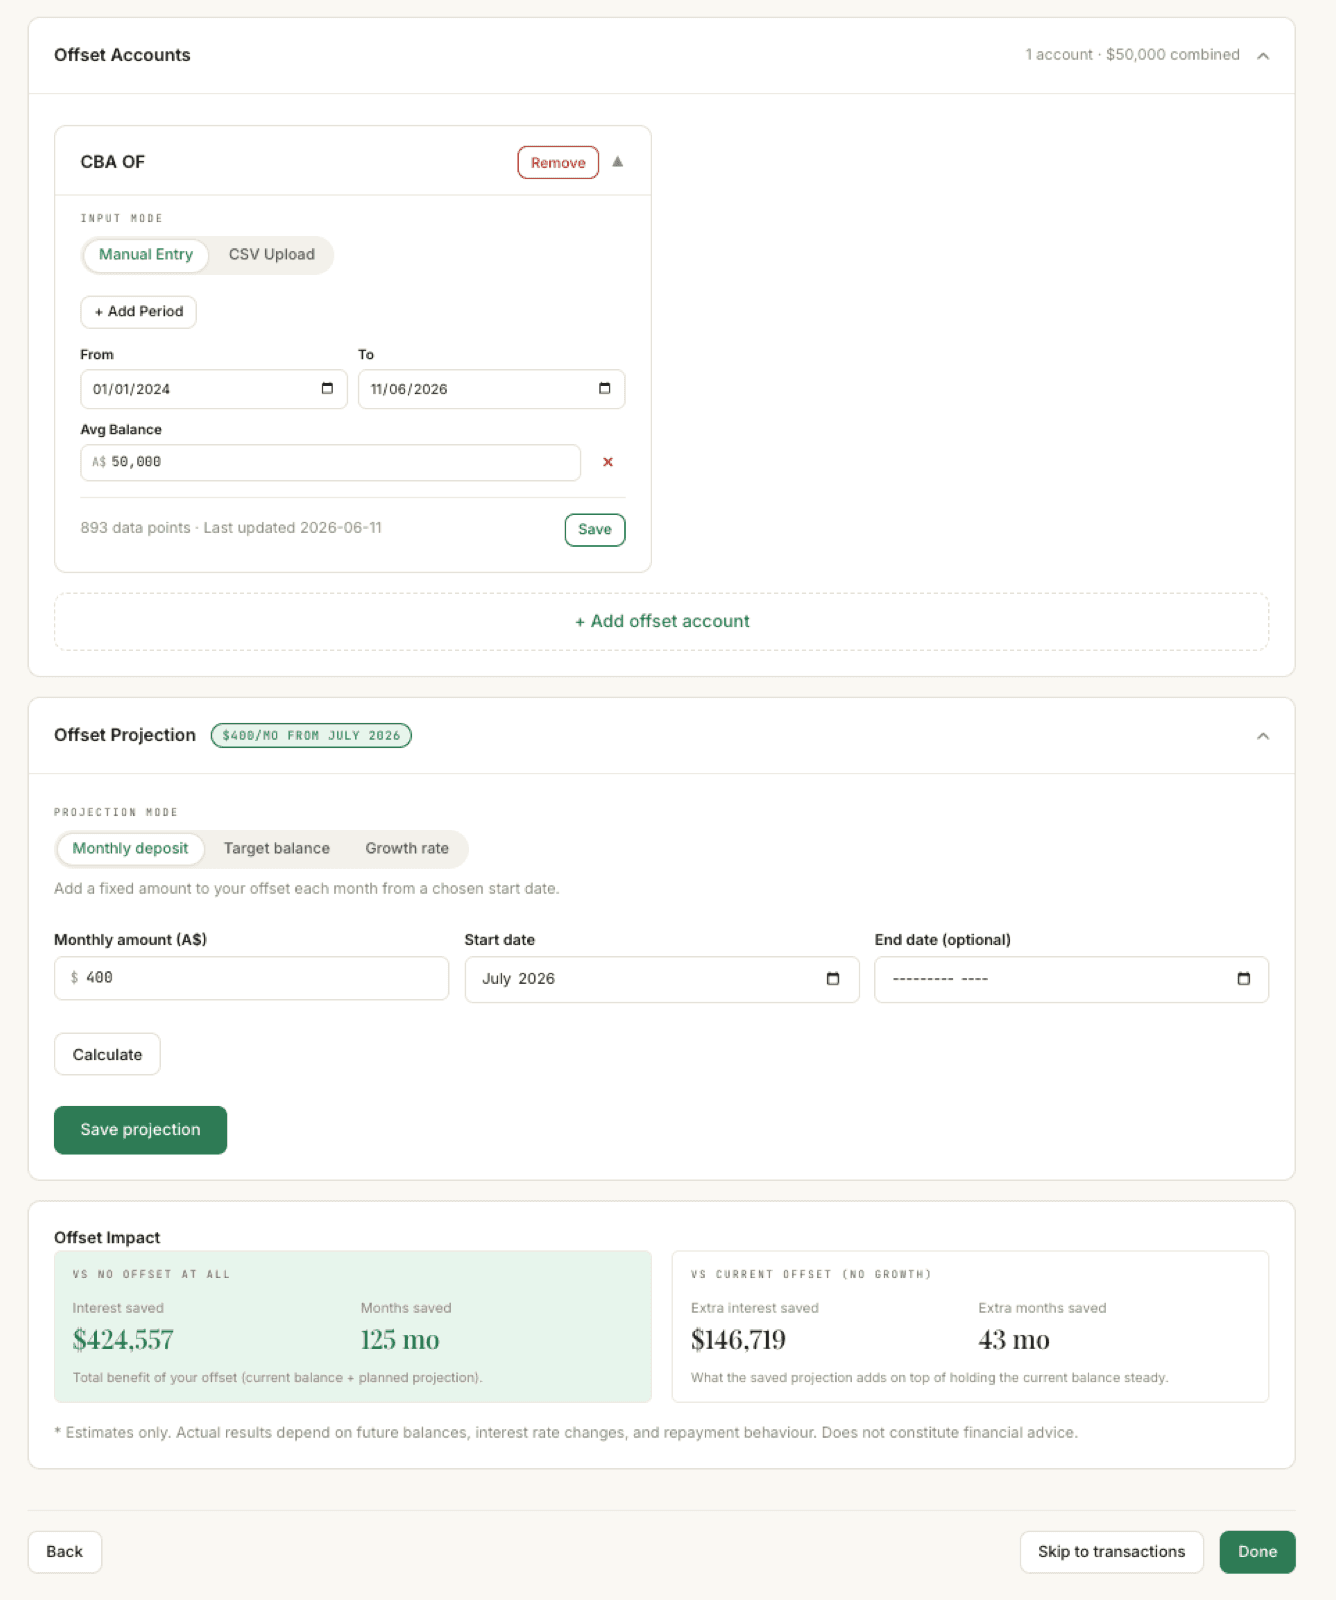
The Offset Impact card underneath shows two views of the same plan:
- Vs no offset at all — “Total benefit of your offset (current balance + planned projection).” Everything your offset does for you compared with a loan that has no offset — above, Interest saved $424,557 and Months saved 125 mo.
- Vs current offset (no growth) — “What the saved projection adds on top of holding the current balance steady.” Just the extra benefit of the plan itself, compared with leaving today’s balance sitting still — above, Extra interest saved $146,719 and Extra months saved 43 mo.
Saving the projection also redraws the chart at the top: the historical line continues as a dashed projected line (Showing historical + projected balance), and the footer now reads Chart extends to projected loan payoff date (with this projection in effect).
06Done
The saved projection flows back to the loans page too. The Loan Health card now draws three payoff curves — Standard payoff, With current offset, and With projection — so you can see the gap your savings plan opens up, and the strip below shows the resulting Payoff date and Interest remaining.
Click Done to head back to the property, or Skip to transactions to keep moving through setup. Your loan’s monthly interest now flows into the statement grid automatically — you’ll see it there with a Loan badge.
Back on the property dashboard, the completeness banner ticks over: Profile completeness is at 60%, the current step is Step 4/5: Transactions, and the Next: Transactions → button leads straight into the next guide — tagging transactions.
